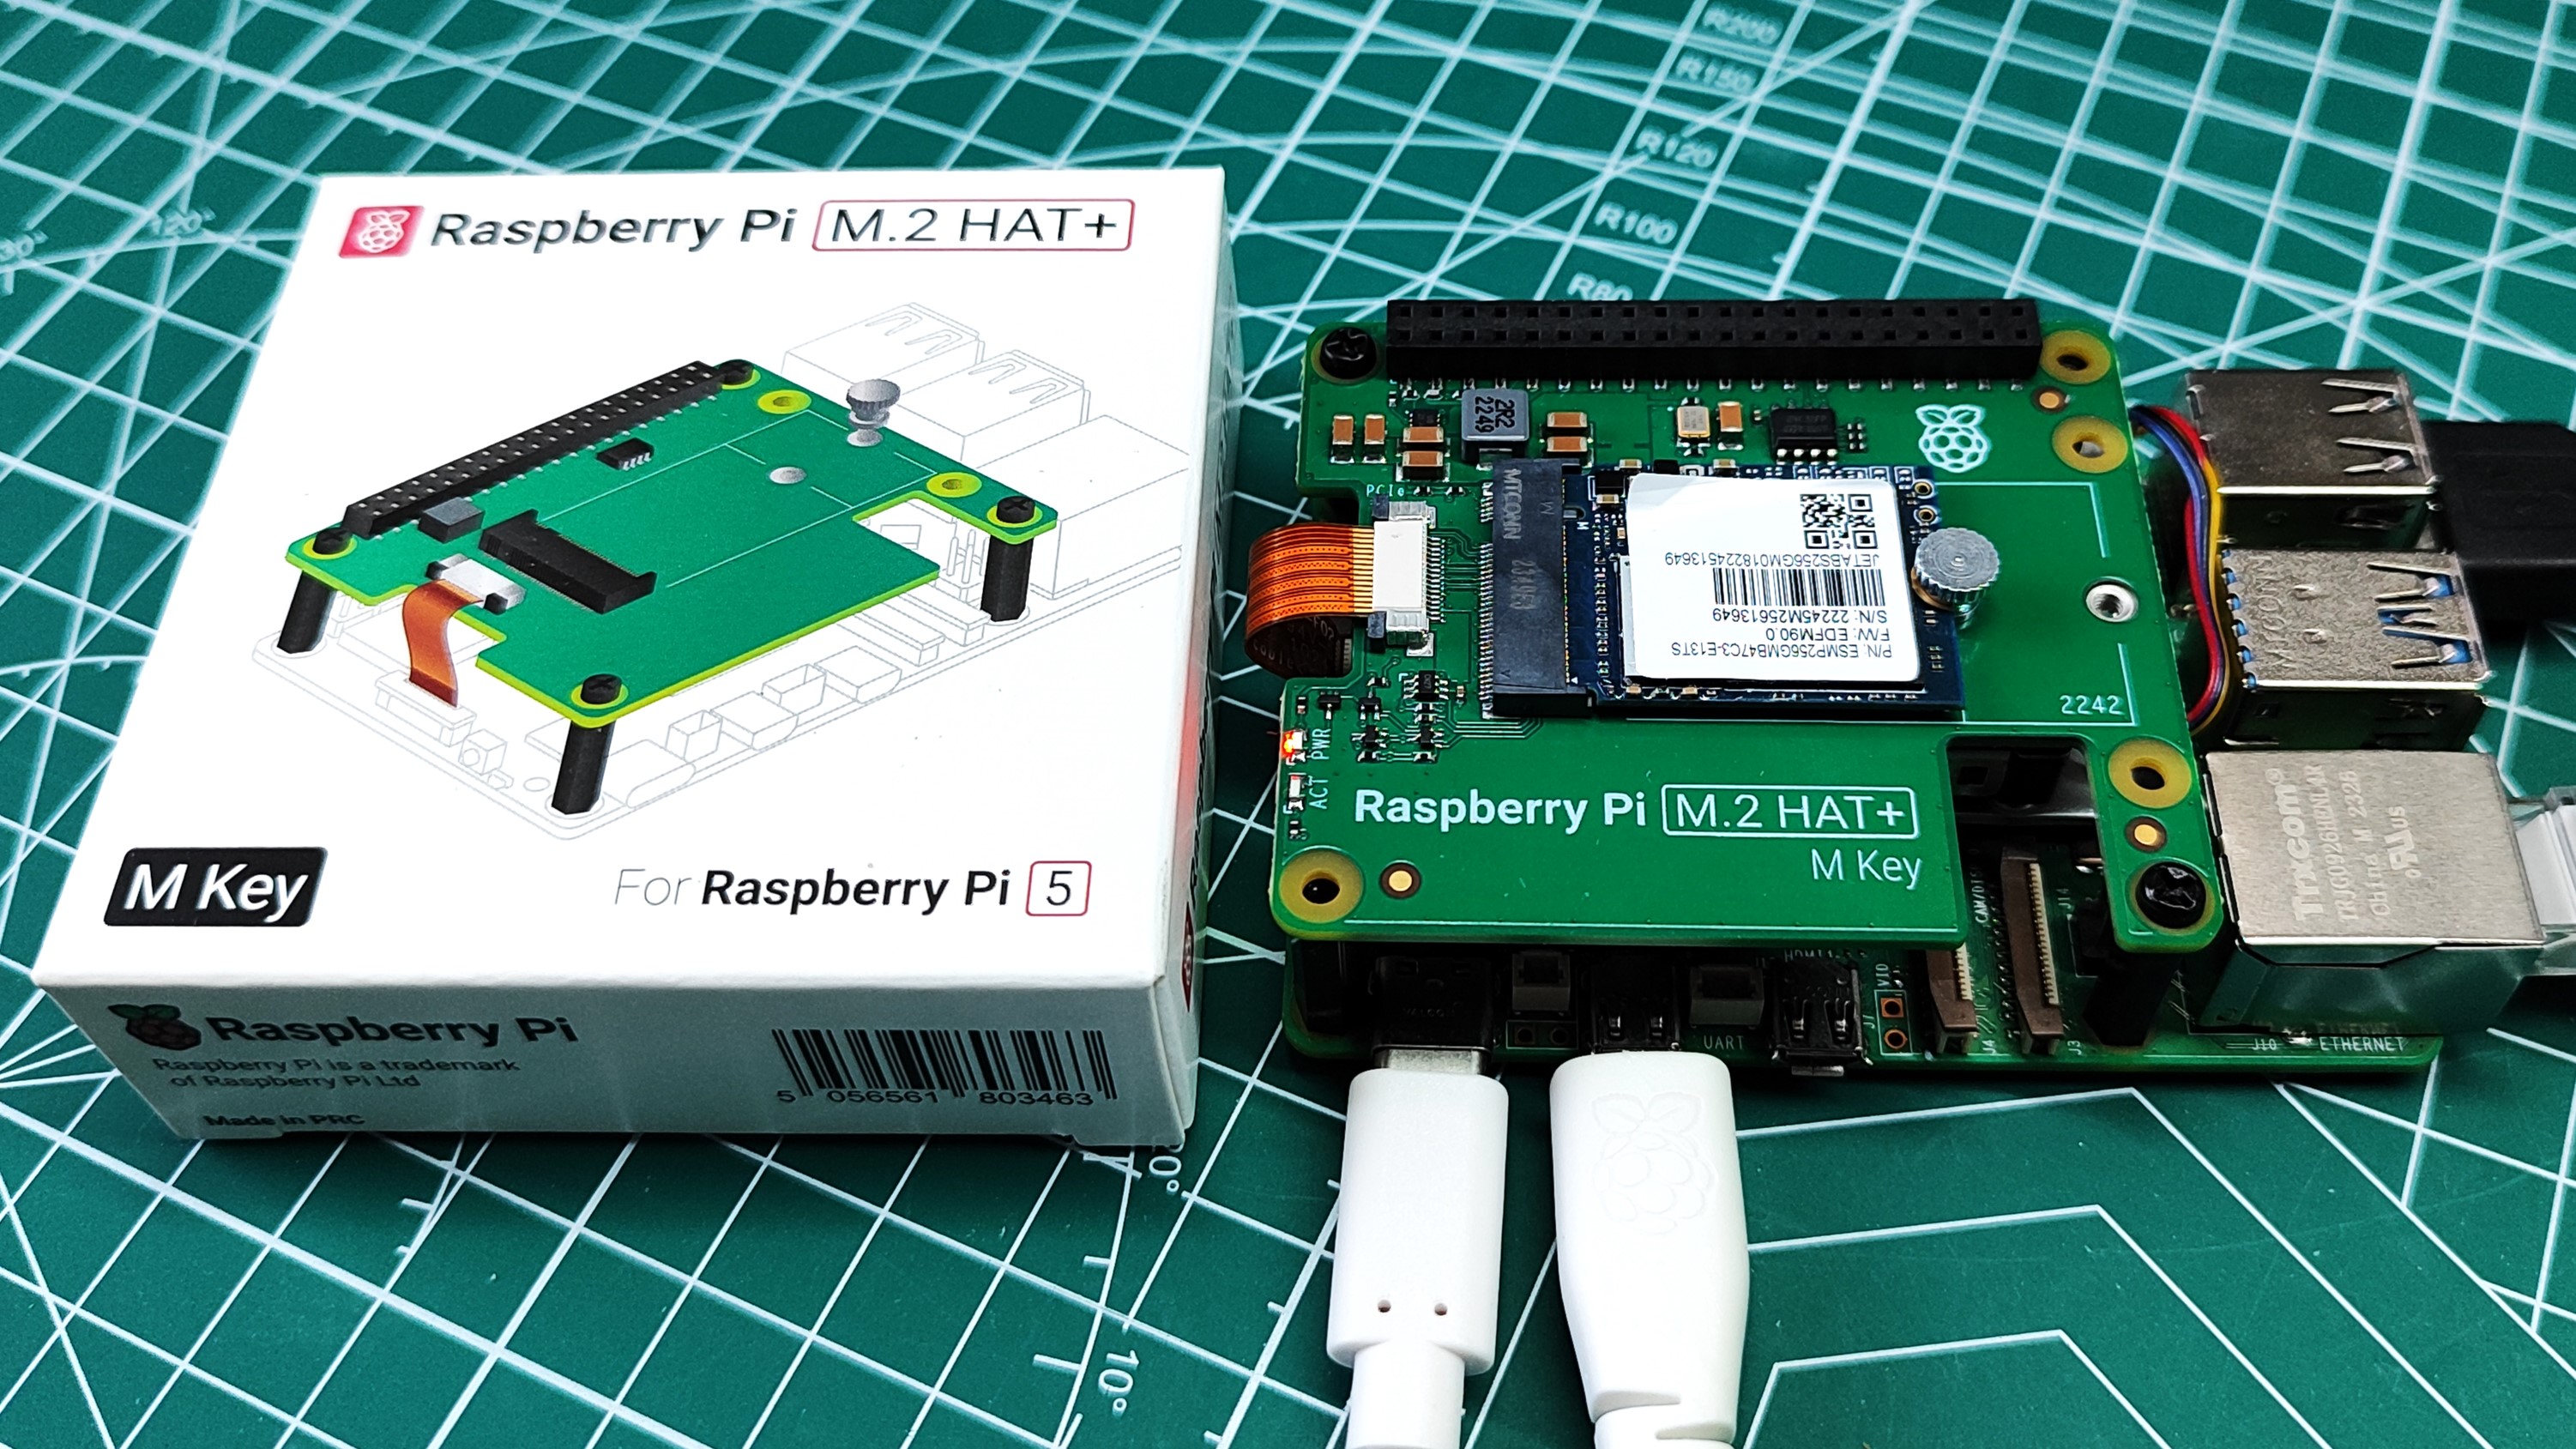
The latest Raspberry Pi NVMe board is the long awaited $12 Raspberry Pi M.2 HAT+ for the Raspberry Pi 5 and it seems that the long wait has been worth it. The low price will entice many to take the plunge and it seems that the board can support PCIe Gen 3 speeds, despite what the official product brief says.
How does the Raspberry Pi M.2 HAT compare to the established heavyweights in the field? Will it beat Pimoroni’s NVMe Base or Pineboard’s (previously Pineberry Pi) HAT Drive boards? Or should we just bite the bullet and spend $49 on the Argon ONE V3 M.2 which has NVMe, great cooling and easy GPIO access?
Let’s find out!
Raspberry Pi M.2 HAT+ Specifications
| Drive Support | M.2 2230 and 2242 M key only |
| PCIe Interface | Single-lane PCIe 2.0 (500 MB/s peak transfer rate |
| GPIO | Passthrough connector |
| Dimension | 65 x 56.5 mm |
Setting up the Raspberry Pi M.2 HAT+
Assembling the M.2 HAT+ is a breeze. One side of the PCIe cable is pre-connected to the board, the other has plenty of length to reach the PCIe connector on the Raspberry Pi 5. The included 16mm standoffs provide distance between the active cooler and M.2 HAT+. This distance is necessary to keep the Raspberry Pi 5 cool; more on this later.
The standoffs and machine screws are plastic, and generally these are fine. We wouldn’t screw / unscrew the machine screws too often as metal screwdrivers often weaken plastic screws. Our review unit came with one screw that still had some plastic flashing embedded in the screwhead. This meant that we had to use just three screws, and yes, we did try to scrape out the flashing.
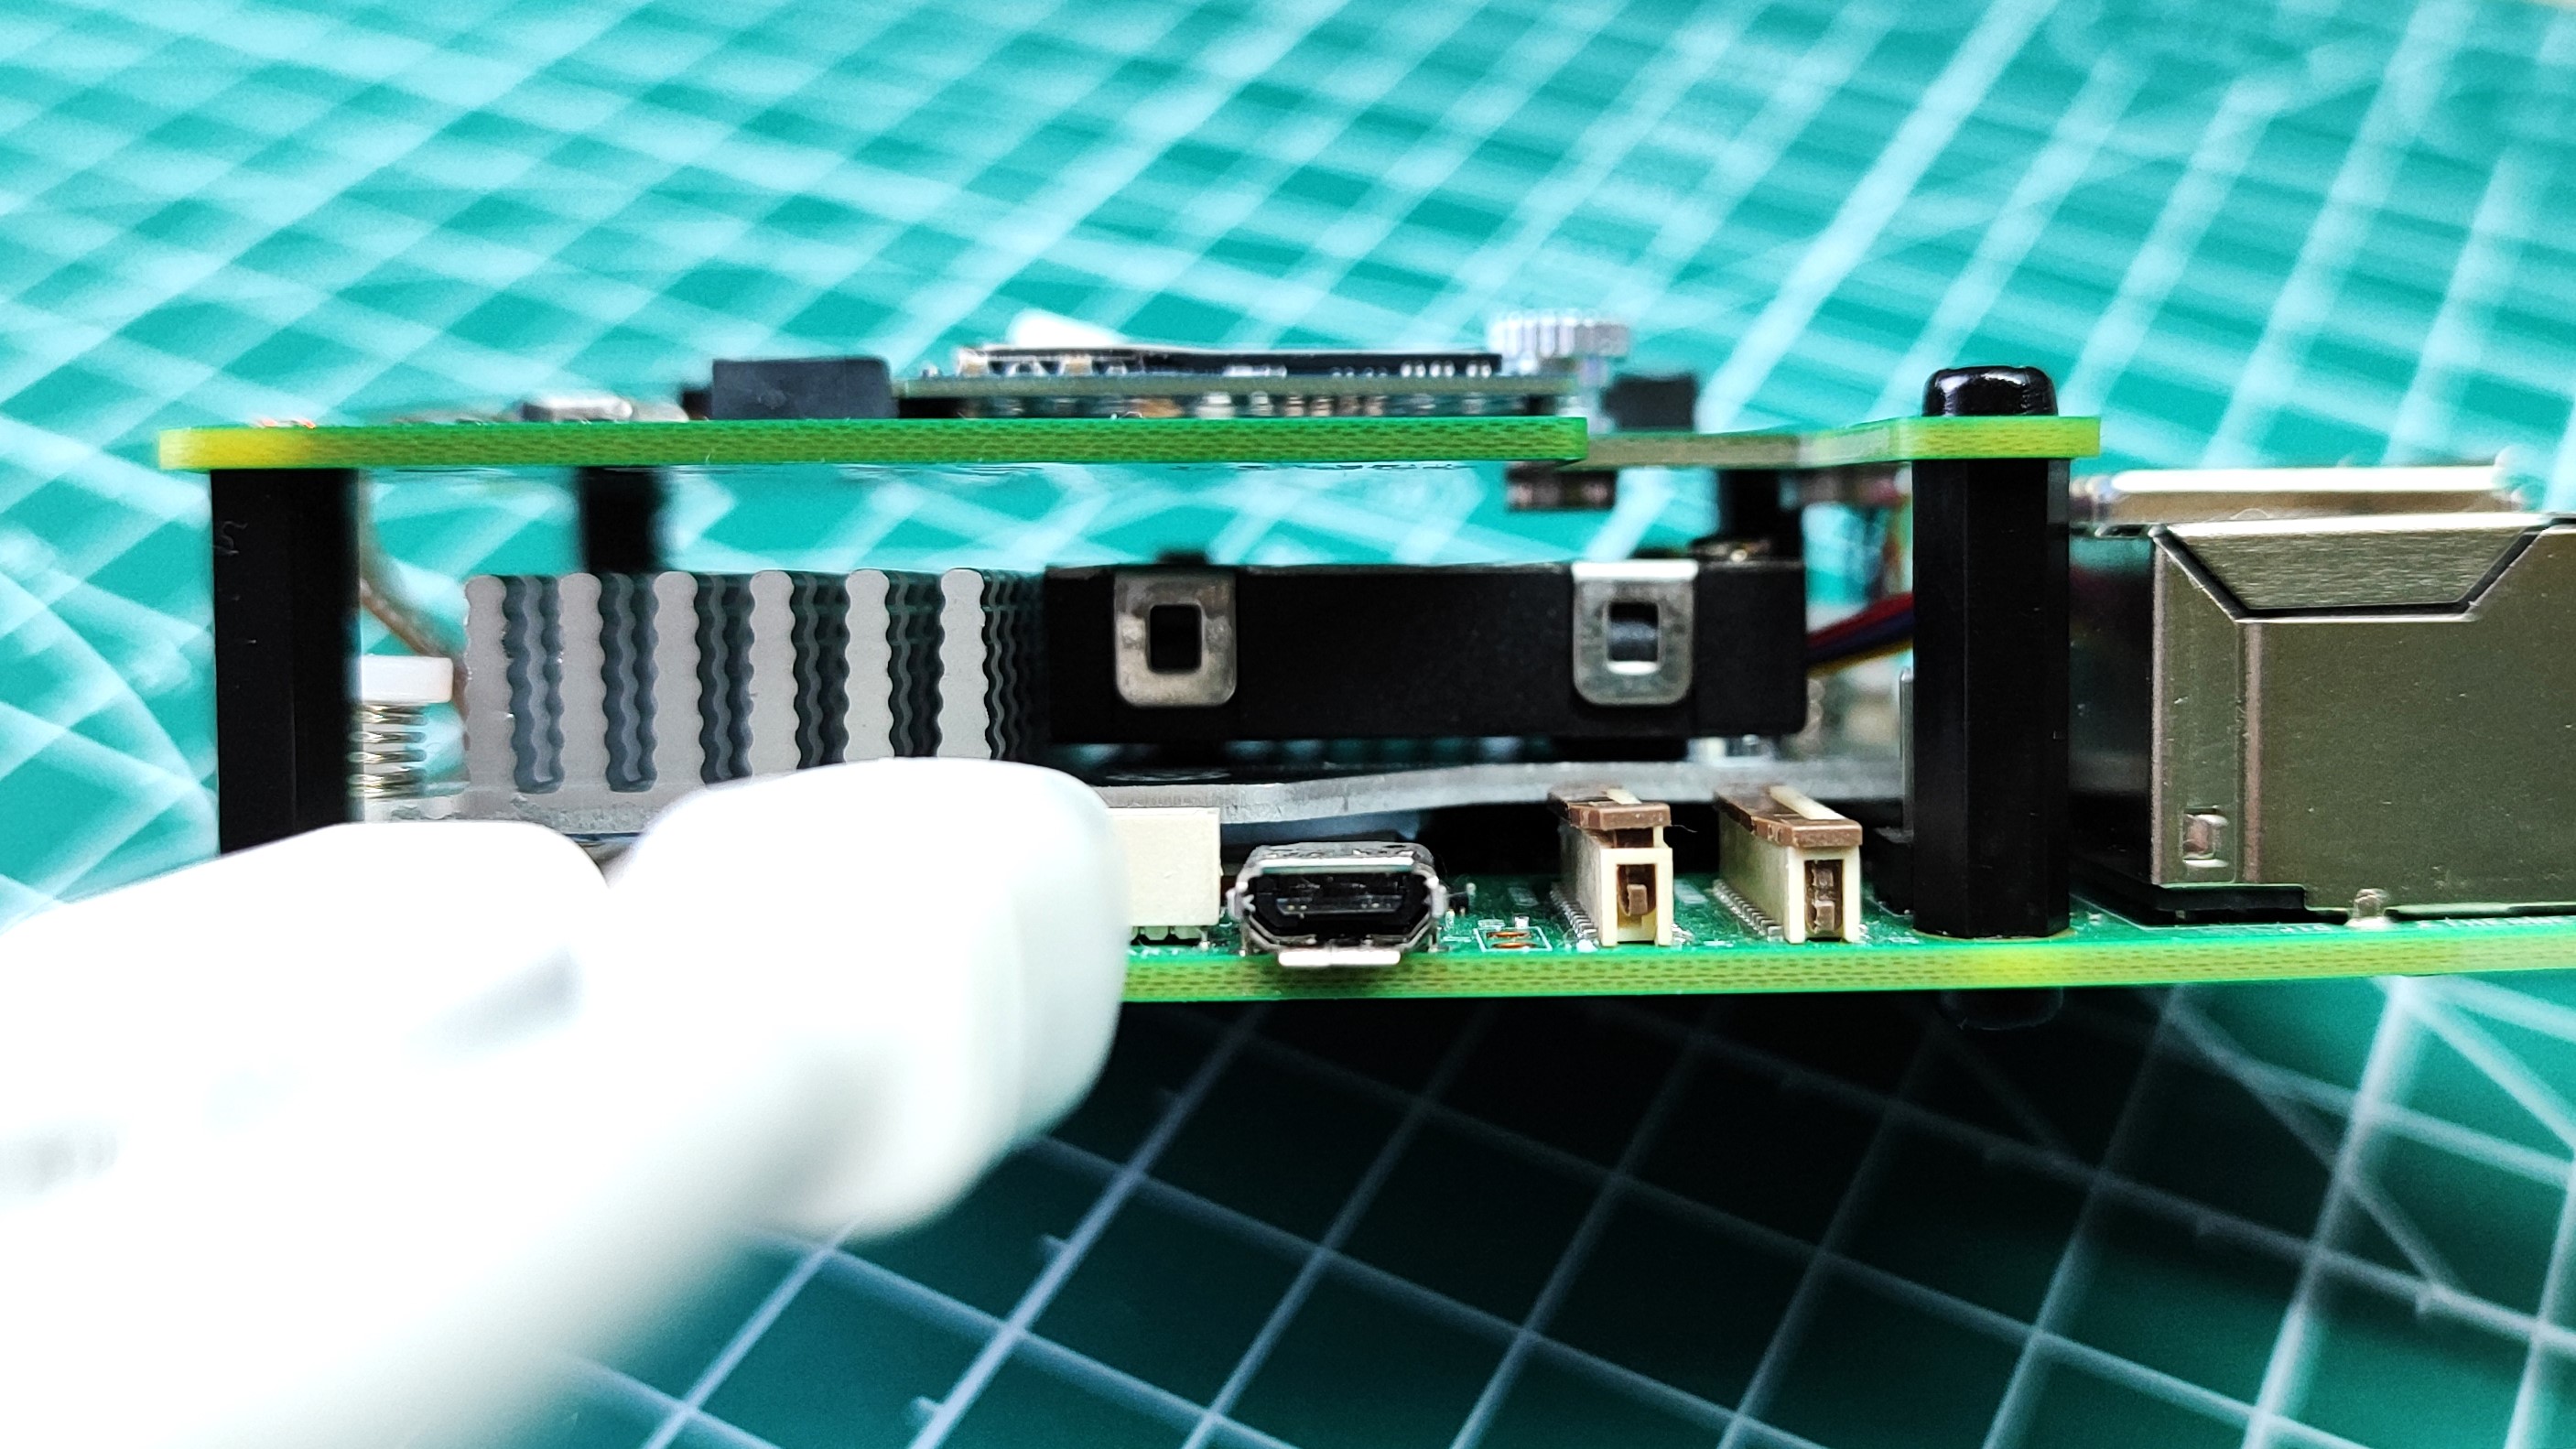
We also noted a potential issue with the 16mm spacers and the included GPIO extension. In that they reduce the chance of connection between the GPIO on the Pi 5 and the connector on the M.2 HAT+. Typically the extension is pushed through the GPIO holes on the HAT+ board, then the entire unit is placed on the Raspberry Pi 5. Doing this gives us some GPIO connectivity. The 5V and GND pins make a connection, but other pins do not. We know this because we “beeped it out” using a multimeter in continuity mode. The obvious solution is to push the extension header further down the GPIO pins of the Pi 5, but that leaves us with just a fraction of the GPIO header for use with stacked HAT boards, or jumper wires. A better solution would be to use 12mm spacers. We tried 14mm, but it was just too far. Our only other length of M2.5 standoff was 10mm and that would see the M.2 retention screw thread touching the fan of the cooler. If you need to use the GPIO, then get either a longer extension or 12mm M2.5 standoffs.
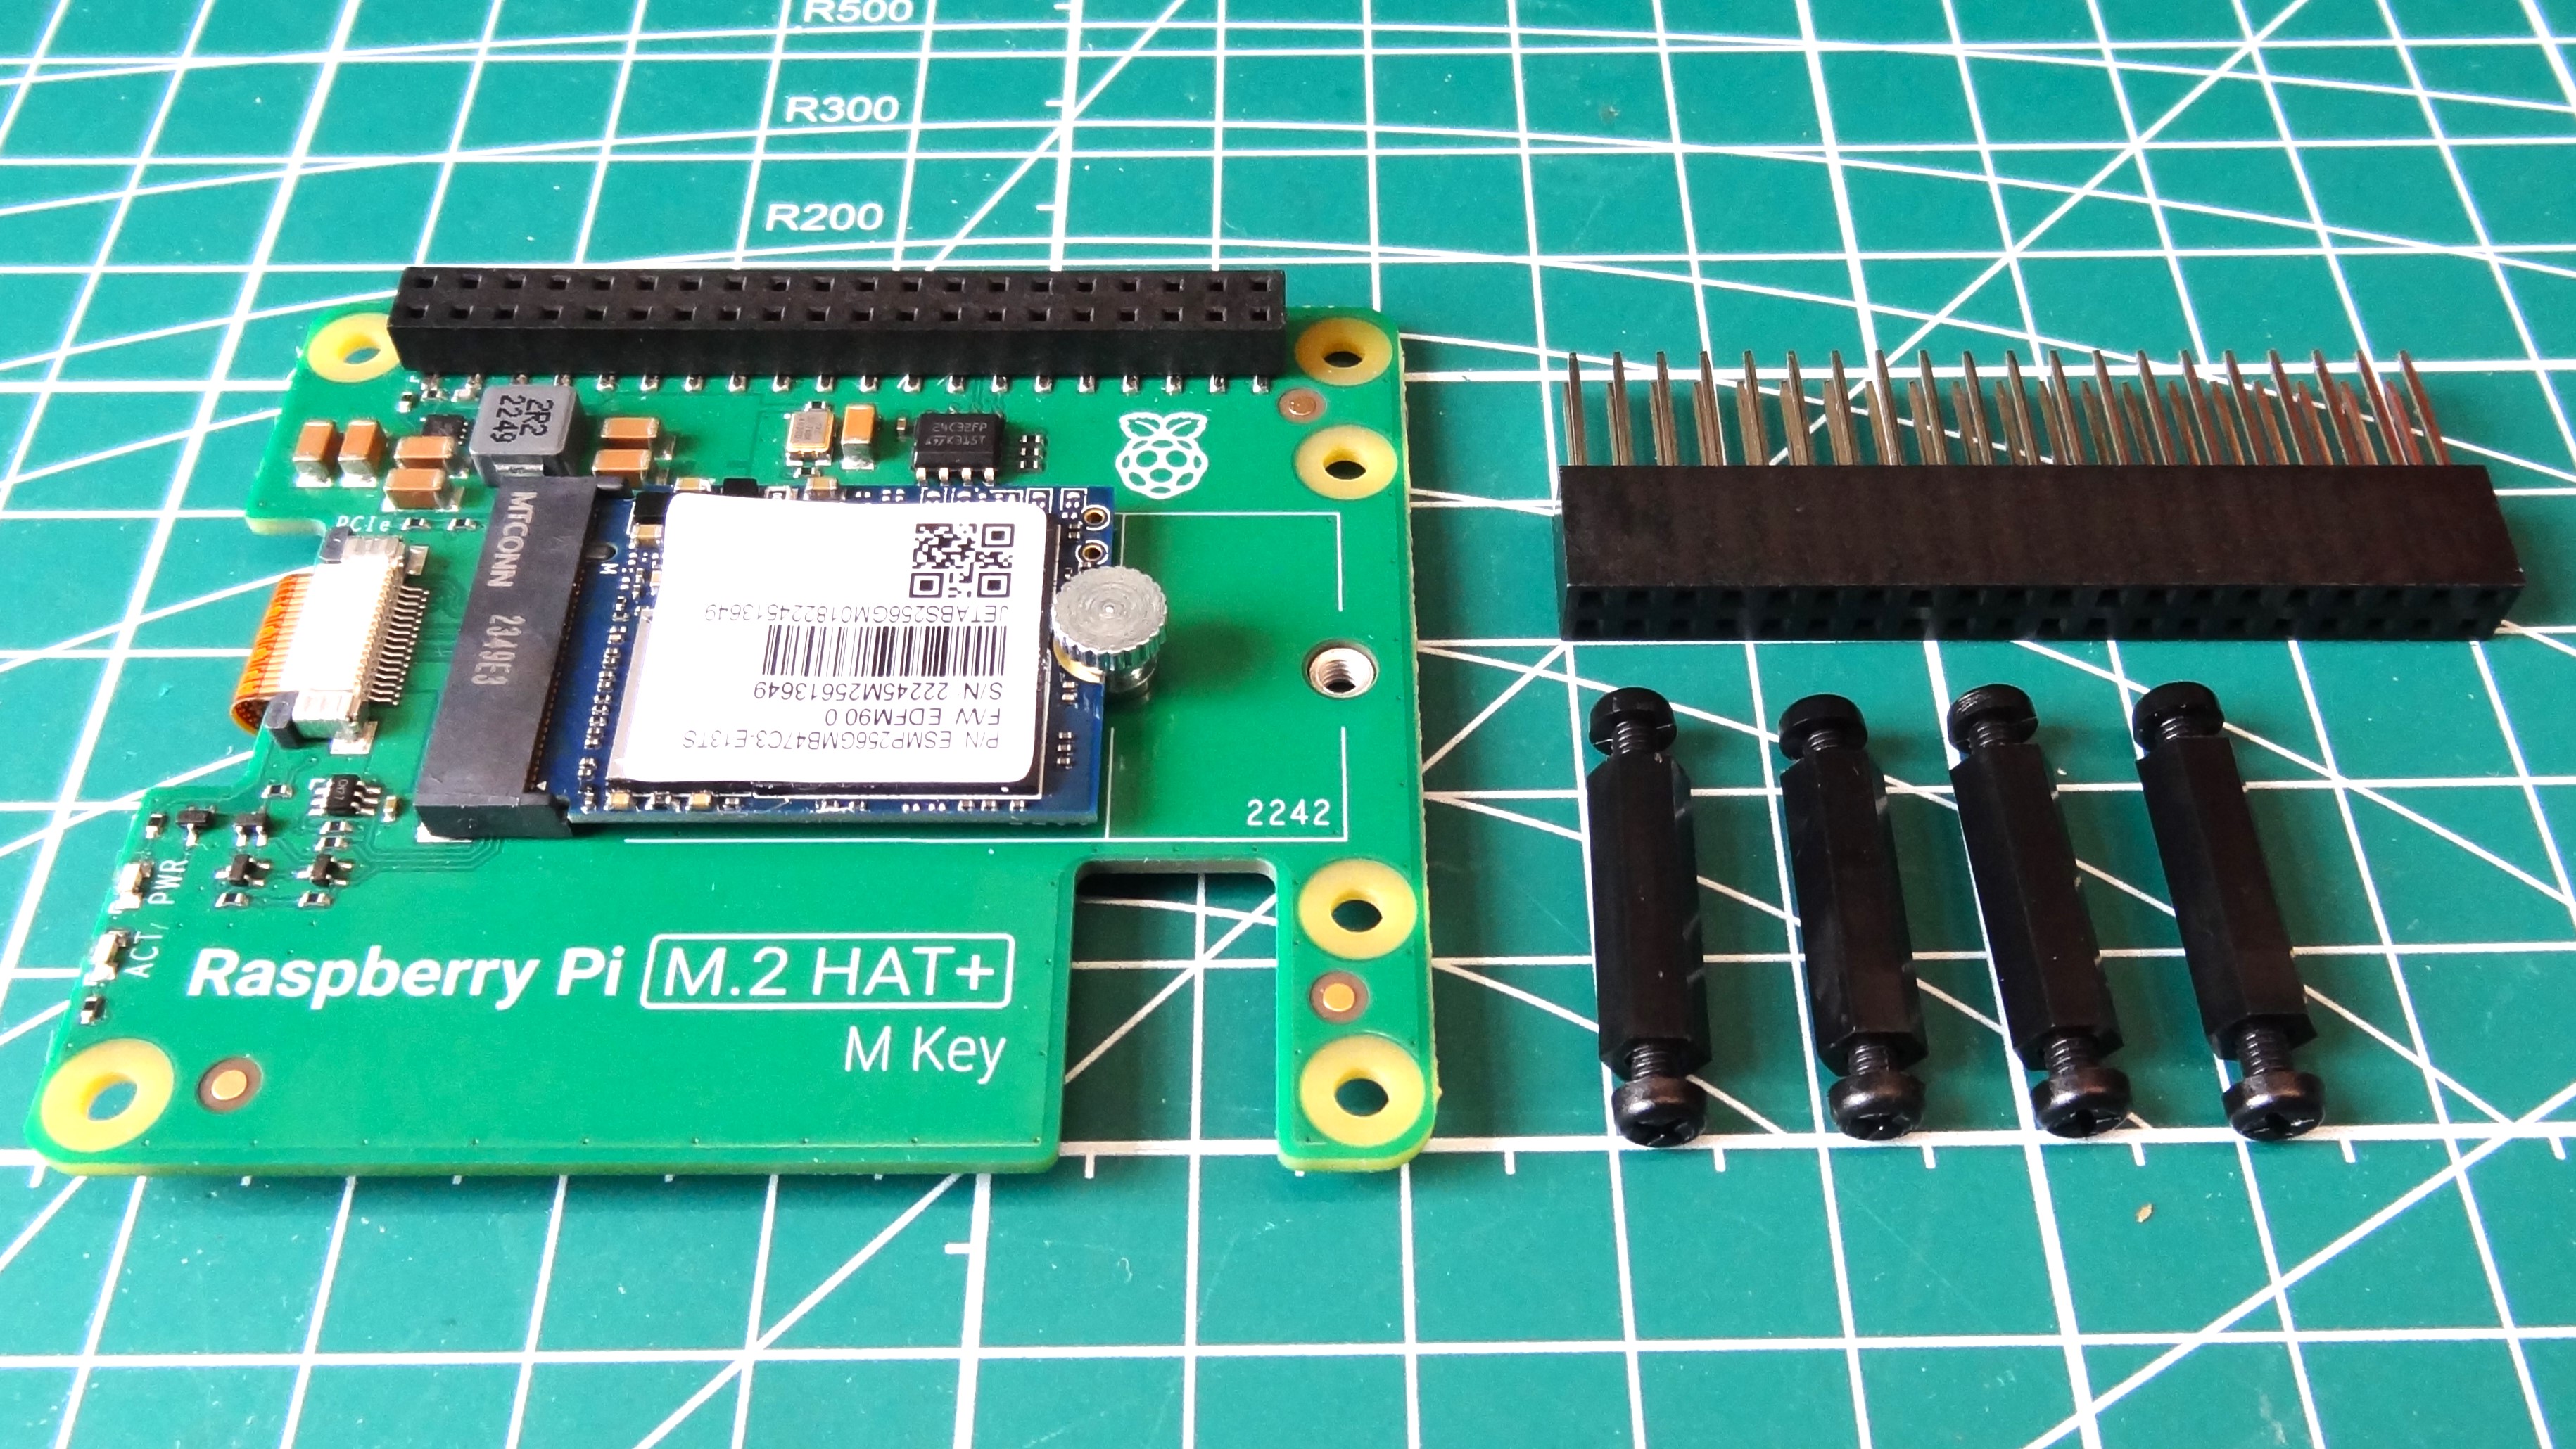
Securing an M.2 NVMe is done using the included “knurled double-flanged screw” which holds the drive firmly, and provides an easy means to access the drive. Finger tight is all we need, so there is no need for a screwdriver compatible cap. Because this board is designed with the new HAT+ standard in mind, it has to stay within the footprint of the Raspberry Pi5, and that means we are limited to 2230 and 2242 drives. But these are cheap and plentiful now thanks to devices such as Valve’s Steam Deck OLED.
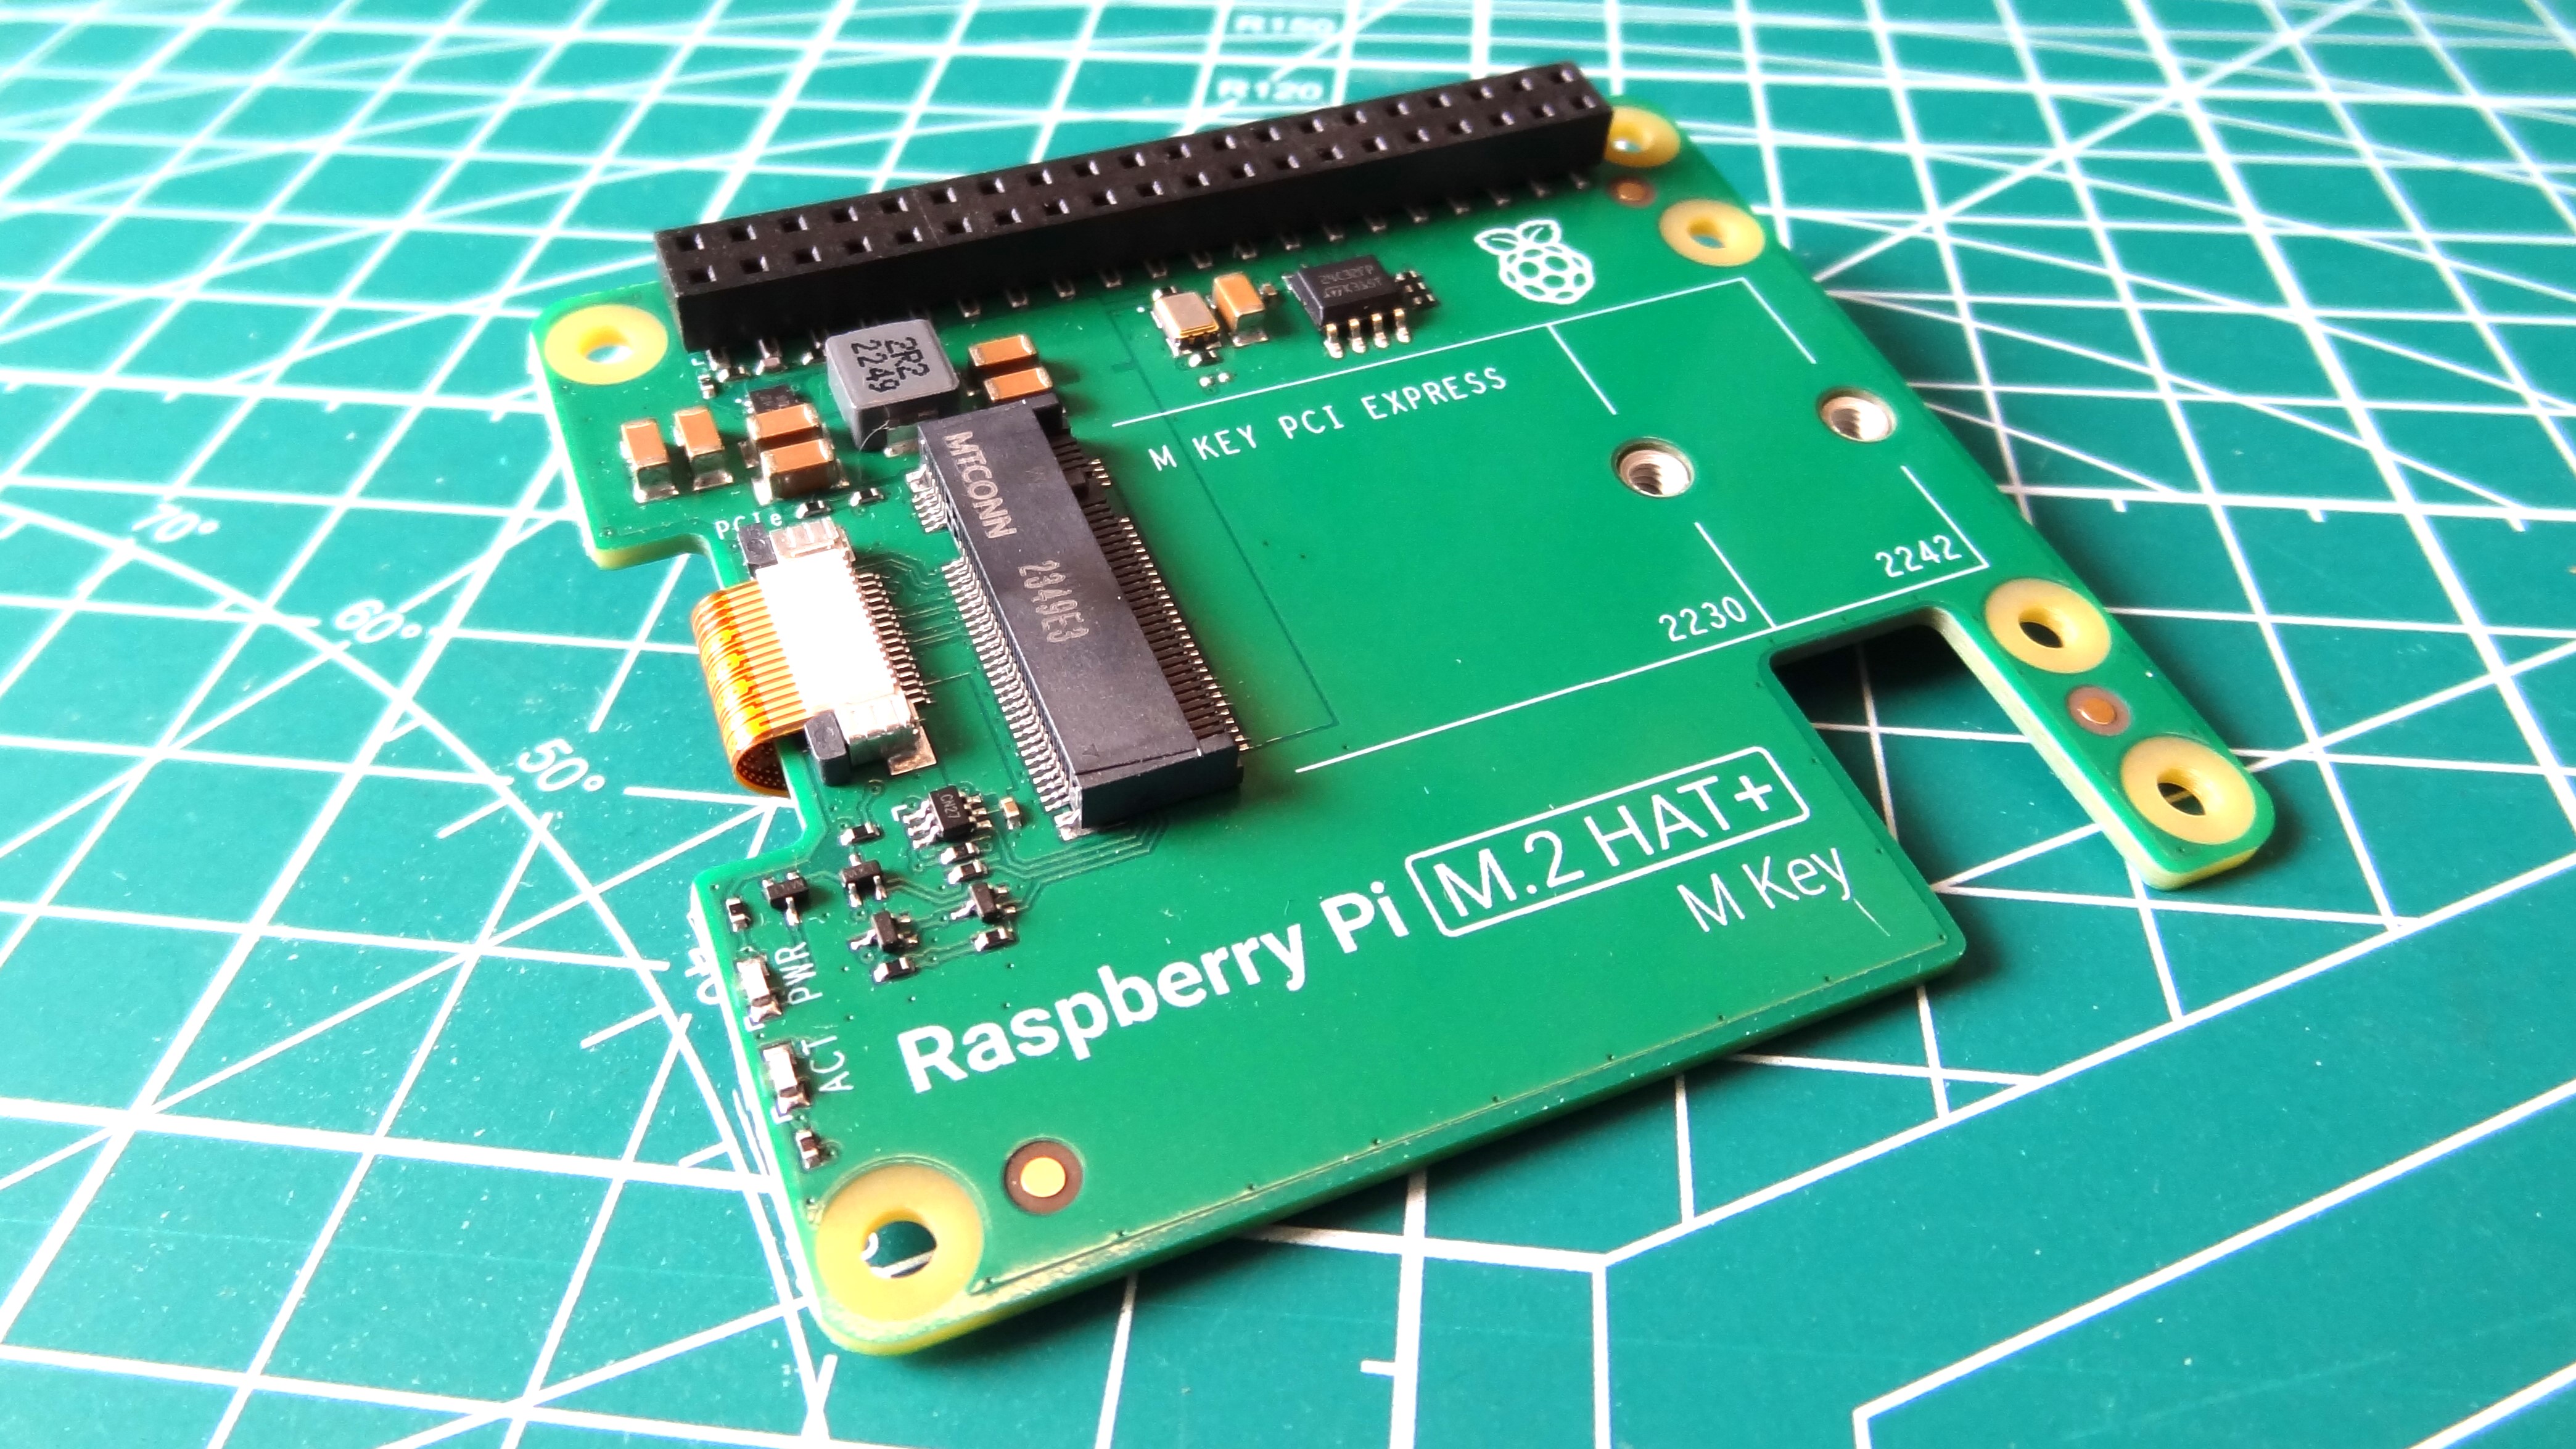
Camera / display port access (CSI and DSI) has been factored into the design and there is a cutout for reasonably easy access. You’ll need long fingers or a plastic pry tool, but you’ll manage to connect your camera / display without much issue.
As long as you have updated the firmware on your Raspberry Pi 5, the M.2 HAT+ will work out of the box. We’re running the April 20 2024 firmware on our test machine and after writing the latest Raspberry Pi OS to a spare 2230 NVMe (taken from our recently upgraded Steam Deck) we inserted it into the M.2 HAT+ and powered up.
The beauty of the latest firmware is that it just works and at the default PCIe Gen 2 speeds it works well. The extra speed compared to even the best microSD cards for the Raspberry Pi will become the new norm. Even YouTuber Jeff Geerling has talked about micro SD versus NVMe SSDs on the Raspberry Pi.
The desktop is snappy, software installation is slick and opening apps is way faster than micro SD. The price of a decent quality NVMe SSD versus micro SD isn’t that different. Sure we have to factor in the $12 for the M.2 HAT+, but even with that additional cost, the speed boost is worth it.
You will see an improved web browsing experience, pages will load faster as they stored cached files on the faster NVMe drive. Even YouTube playback is better. We still dropped 840 frames out of a total 3612 frames during a one minute test of Big Buck Bunny at 1080p 60 fps. But the watching experience was much better than Micro SD, which can become a slideshow.
We’ve used Micro SD on all of our previous Raspberry Pi’s, but the current crop of M.2 boards for the Raspberry Pi 5 is converting us to this faster storage option.
Benchmarking the Raspberry Pi M.2 HAT+
An NVMe SSD really speeds up the general feel of Raspberry Pi OS, but how does that compare to microSD?
We’ll start with boot time. MicroSD comes in at 20.75 seconds, whereas M.2 HAT+ takes just over two seconds off that time, coming in at 18.67 seconds. The difference is respectable, if not vast, but two seconds is still two seconds!
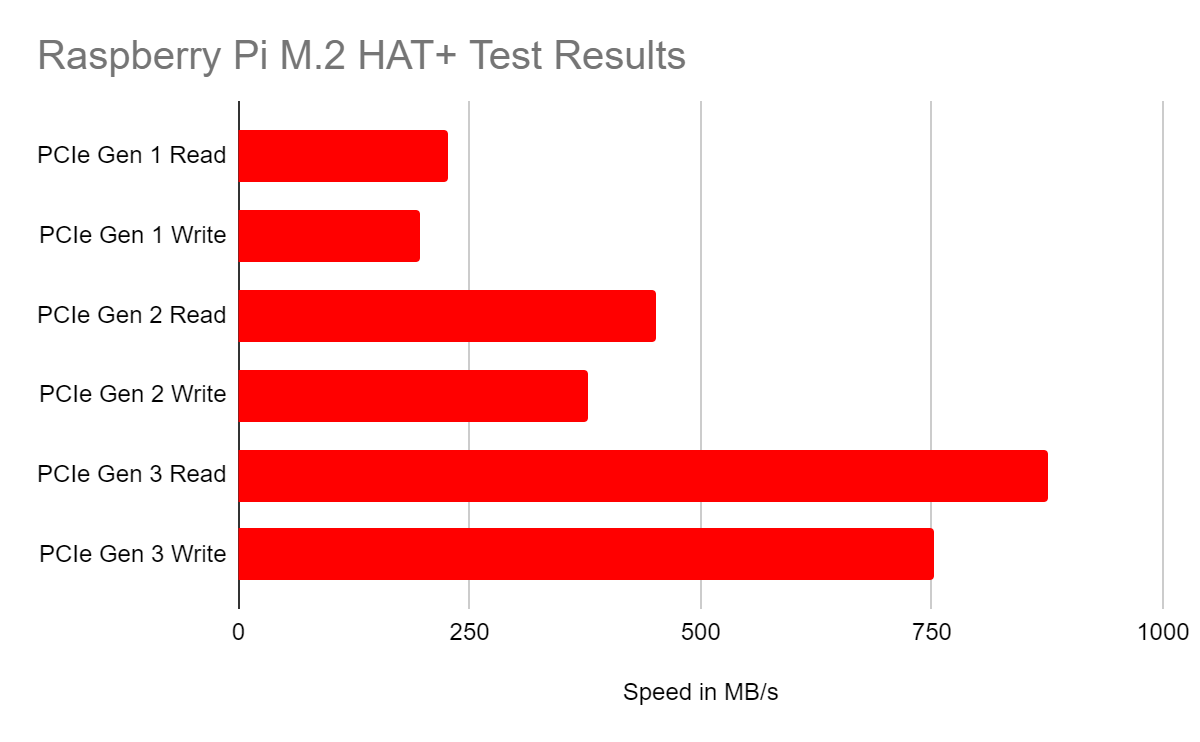
What about PCIe Gen 1,2 and the unofficial 3 speeds? Taking a microSD card as our reference, NVMe SSDs are obviously much faster. Our Cytron Makerdisk MicroSD manages 90.5 MB/s read and 30.8 MB/s write. Even Gen 1 speeds blow the Micro SD card out of the water (226 MB/s read and 196.3 MB/s write). The officially-supported Gen 2 speed is 452 MB/s read and 378.6 MB/s write and that matches the claims made by Raspberry Pi. Pushing onwards to the unsupported Gen 3 and we saw 876 MB/s read and 752.9 MB/s write.
With all the extra months of development, how does the Raspberry Pi M.2 HAT+ stack up against others that we have tested? The short answer is that they are all pretty similar. We’ve collated our test results for Gen 2 and Gen 3 speeds and with the exception of Pineboards Gen 3 write being unusually low, speeds are pretty consistent across the tested boards. We’d hazard an educated guess that the latest firmware has ironed a few PCIe bugs.
| Header Cell – Column 0 | Gen 2 Read / Write (MB/s) | Gen 3 Read / Write (MB/s) |
|---|---|---|
| Pineboards HAT Drives | 448 / 378.6 | 828 / 571.4 |
| VMware NVMe Base | 416 / 380.9 | 876 / 761.9 |
| Raspberry Pi M.2 HAT+ | 452 / 378.6 | 876 / 752.9 |
The M.2 HAT+ sits on top of the Raspberry Pi 5, so how does it affect the cooling performance of the official Active Cooler? Short answer, not a lot. Using the included 16mm standoffs we ran our usual CPU stress test benchmark that recorded the data to a CSV that we dropped into a spreadsheet. With the M.2 HAT+ off we recorded 41.7 degrees Celsius at idle. Under stress this went up to 60.9°C. With the M.2 HAT+ on the idle temp creeped up a little to 43.9°C, and stress was actually half a degree lower at 60.4°C. These temperatures are nothing to worry about.
| Header Cell – Column 0 | Idle (°C) | Stress (°C) |
|---|---|---|
| Raspberry Pi M.2 HAT+ Off | 41.7 | 60.9 |
| Raspberry Pi M.2 HAT+ On | 43.9 | 60.4 |
Bottom Line
The Raspberry Pi M.2 HAT is the cheapest way to get NVMe drives working on your Raspberry Pi 5. The $12 cost is $1.50 less than Pimoroni’s NVMe Base and $8 less than Pineboards HAT Drives. There are some snags, GPIO access being a particular bug bear, but this can be worked around with bits that you likely have to hand, or just pay an extra $1.50 and get Pimoroni’s NVMe Base which sits under the Raspberry Pi 5. Sure we would’ve liked to have seen a 2280 option, but it would then break the HAT+ specification. If you’ve not taken the plunge into NVMe storage on your Raspberry Pi 5, this board is the one to go for.


