Both Dashcams have a Wi-Fi feature, that gets turned on automatically during startup.
BHPian narayanang76 recently shared this with other enthusiasts:
DIY – Adding an interior Dashcam to record events between my front and rear Dashcams, a 2+1 channel Dashcam setup
Even in a Dual Channel Dashcam setup, the events happening between front and rear cameras are completely left out. The need to have an interior camera kept growing in my mind, mainly for 2 reasons – capture those happy driving moments and have additional safety backup footage for the area between front and rear cameras.
As I have updated in this thread before, I have a dual channel Viofo A139 Pro 2CH Dashcam setup in my Fortuner. I am using it more than 1 year, and this camera can also support an additional 3rd channel, making it 3 Channel Dashcam. I only need to get the additional interior camera and cable then connect it. The additional interior camera cost approx. 5K INR. But I didn’t want to impact the recording quality and compromise the critical aspect of the main Viofo Dashcam, that is record Front and Rear footage consistently. I believe the Viofo Dashcam can get really overheated, SD card can get corrupted more frequently, and front video quality will surely be compromised, if I add the third channel to my Viofo A139 Pro. Hence decided that it will be a separate independent unit if I add my interior dashcam.
Also, the third channel is almost like a nice to have option, I didn’t want to spend more on this. As a relief, I had one extra 256GB SanDisk microSD card lying around, so that is saved. I wasn’t any particular about recording and video quality, glare issues, specifications of the cam or Starvis sensors etc, this being an interior camera.
During the research I came across few options for adding this camera. One option was to utilize my 8-year-old SJCAM SJ4000 Wi-Fi which is lying unused for last 1 year. However, that is too big and also, I wasn’t sure about it reliability now being too old version. Other option was to buy any other dashcam available in India.
I finally decided to go with Qubo Dashcam Pro X, which was running an offer during November 2024, its MRP was 5590 INR and offer price was 2990 INR, I found this to be cheaper than my MicroSD card’s price. I explored other options for a while and finally decided to take the plunge. Ordered it, and it got delivered in 3 days. I got it installed myself on the same day and found it to be decent for my needs.

Anxious Unboxing
Working of My 2+1 Channel DashCam setups:
- Viofo A139 Pro 2 CH is hardwired. Front camera records footage in 4K resolution and rear camera records in HD. These 2 separate footages of 5 minutes are written on one 256GB MicroSD card on Viofo.
- Interior Qubo Camera is connected to the 12V socket and placed on windshield above IRVM. It records footage onto a 256GB MicroSD card of its own.
- Both the DashCams, have WiFi feature and they get turned-on automatically. So, it is easy to connect to respective Mobile Apps and view/transfer footages on a need basis.
Many other BHpians will be using Qubo Dashcams, so I am not planning to write a review. But I want to share few observations and my experience of setting up this cam.
Set-up Experience:
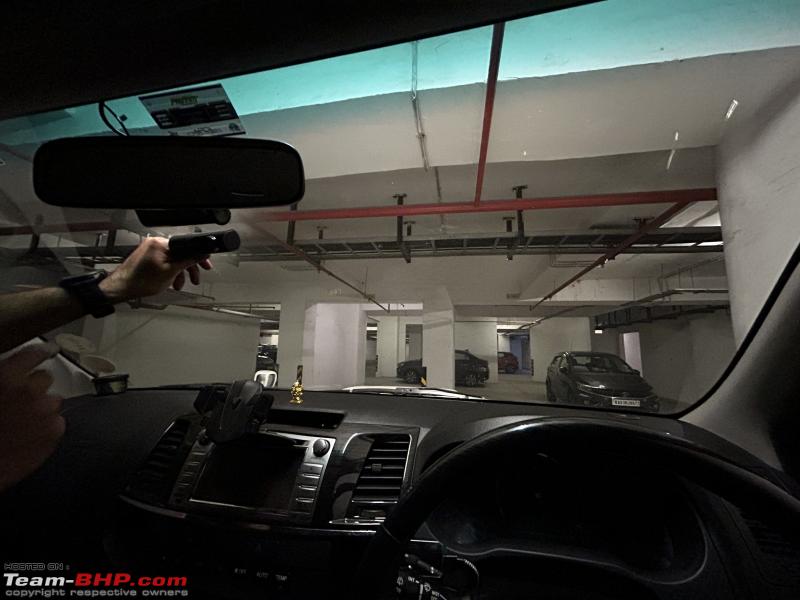
- First, Interior camera placement was most important. I need it to capture most of the cabin interior. I also didn’t want it to stand out, interfere with my Viofo field of vision. After few trials and error, decided that it will be placed above IRVM, without interfering IRVM’s movements.
- Then logical way to route the cable was through driver side A-Pillar. I had couple of other wiring going through A-pillar already, so I had to keep them properly tucked in and it took max 10 minutes.
- Qubo Dashcam came with an anti-static transparent film, I used it to fix the camera properly onto windshield. Connected the camera to the cable and turned on ignition, to test the camera and do the Dashcam setup.
- Setting up Qubo App was initially challenging. I was doing this in my apartment basement and due to poor network connectivity, the MobileApp was not able to complete the setup steps, even after 3-4 attempts. Finally, I decided to take the car outside to an open area having better mobile signal and it completed the setup in 2 minutes.
- Final step was to align the camera angle for better field of vision, hiding the remaining cable length, and checking recording footage quality and rest of MobileApp settings.

Trying out different placement options

Final placement where it is installed
The entire DIY setup took more than 30 minutes, most of the time was spent on camera placement and post-installation App setup.
Observations:
- Both Dashcams have Wi-Fi feature, that gets turned on automatically during startup. Viofo also connects to the mobile automatically, which is a nice feature. I always leave it like that, the Viofo DashCam get synced to the Mobile App always. Qubo Dashcam also has Wi-Fi, however it doesn’t get connected to phone automatically, which is also good in my case.
- Viofo records footages in 5 minutes loops, for both Front and Rear cam footages separately. Qubo captures the entire ride footage as one, and during download from MobileApp we can select the duration that we need. This is also good in my case, as I may rarely need the interior cabin footage, and use it for any critical purpose.
- Qubo footage quality isn’t great and comparable to Viofo footage quality. However, that is no deal breaker for me.
- This Qubo Dashcam doesn’t have GPS, and I didnt need it also. My Viofo Dashcam has GPS so that covers the important part of the rides.

Screen Grab from one footage. Ignore the poor basement lighting & black interiors
Cheers,
narayanang76
Check out BHPian comments for more insights and information.


