Apart from being a dashcam, it also features Android Auto, GPS and anti-theft function.
BHPian dkaile recently shared this with other enthusiasts:
So the Navigator 6 was getting quite long in the tooth and out-dated, in this era of Android Auto devices. I had heard good things about this Aoocci (strange name) device and it was quite competently priced compared to the 50k they were asking for the Chigeewhich was its nearest rival.
I purchased it directly from their website (no affiliations) with some online discount codes (around 30% IIRC), and the total landed cost to me was 14,595/- all inclusive. Very strangely, it was shipped by some warehouse in Delhi by DTDC and I received it in about 10 days’ time and I had to pay no customs, etc. They must have very nice arrangements for India delivery at their backend.
This is how I received the packaging from DTDC –

A very nice Box inside –

Some specs on the side which are self-explanatory. It’s supposed to be Ip67 waterproof –

The Box contents – with Dual cameras, TPMS (which I did not install as my bike has it by default), all mounts and accessories –

Mounting Hardware for the handlebar was included separately –

A closer look at the device itself –

Fantastic fit and finish and aluminium alloy body –

A 64GB micro SD card was included for free for camera recordings –

Metal cover to install the card –

Made waterproof with proper rubber bungs for the ports. Also, notice a C-Type USB port to run it directly, when the device is off the bike –

The ports revealed below. All of very high quality –

Aluminium alloy back with integrated GPS –

Waterproof power box to connect to accessory power supply (switched). Multiple options were given to power up the device –

With an included inline 3A fuse –

A USB Type A power supply cord as an optional way to power it up. I presently use this method as I find it more convenient –

Solid Ball Joint to attach the device to the handlebar mount –

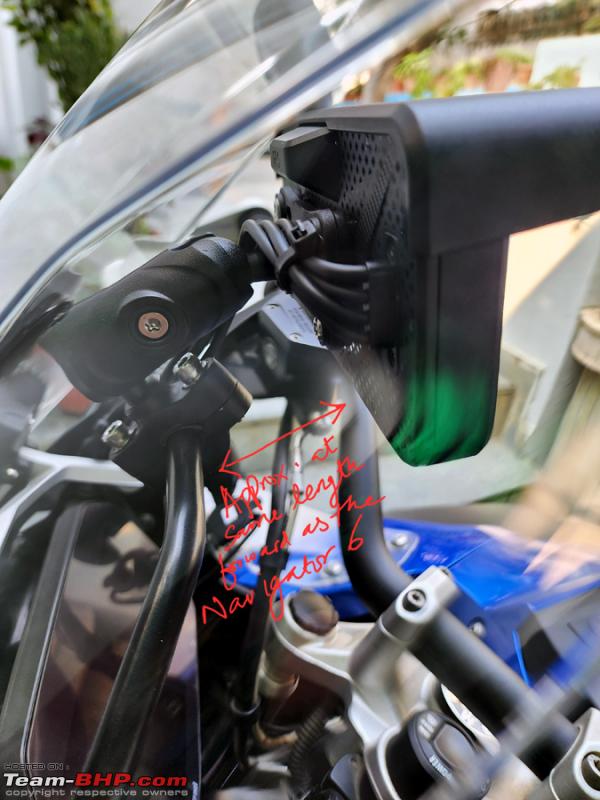
A size comparison with the BMW Navigator 6. Almost the same external dimensions with a much bigger display area –

Getting ready to remove the Nav Mount from the bike to fit the C6 Pro. These zip ties needed to be cut to free up the wiring –

GPS Mount power socket disconnected from the bike’s OE wiring –

Getting ready to remove the screws so nothing falls in the crevices –

These nuts have a tendency to fall and never to be found again… lol –

Nav Mount removed in 5 minutes –

The full mounting displayed –

Both the Accessory power adapters were used including this Denali one –

The Nippy Norman one attached to the power box, which inline attaches to the Denali connector as shown earlier. I attached this but eventually used only the USB connector one –

Mounting completed on the handlebar mount –
Everything was neatly zip tied not to be visible at all from the front –

The final result. No going back to Nav 6 ever –

Maps in full screen in Android Auto. Wireless connection –

Night View of the setup –

Continue reading dkaile’s post for BHPian comments, insights and more information.